Working with your HDSLR footage in Vegas Pro 10
by Gary RebholzVegas Pro 10 software has been released for less than a month and already the improved support for your HDSLR footage is making big waves throughout the user community. There are a few things to keep in mind to get the most out of this type of footage though, so in this article, we'll take a look at the HDSLR workflow.
For the most part, you use the exact same techniques to work with files from your HDSLR as you do any other footage that you add to your Vegas Pro timeline. There are no specific “HDSLR-only” editing techniques that you need to learn, so if you already edit other types of footage with Vegas Pro software, use the same techniques for your HDSLR footage.
Before you start editing, however, you'll naturally have to get to the footage you shot. When you transfer your footage from your camera's memory card to your computer drive, keep in mind that HDSLR footage isn't the most efficiently editable format on the planet; it requires a lot from your PC and disc drive. For that reason, store your source footage on your local hard drive instead on a network server. Trying to pull the footage down from a server—particularly one that lots of other people are hitting for a variety of reasons—is a great way to cause yourself undo frustration as you preview your project and experience low frame-rate playback.
Next, match your project video property settings to your source footage. When you do this, Vegas Pro software has fewer calculations and conversions to perform and can thus play each frame of the timeline more efficiently.
To set your project video properties to match your source footage, click the Project Video Properties button in the Video Preview window. This opens the Project Properties dialog box, shown in Figure 1, to the Video tab where you can specify your settings.
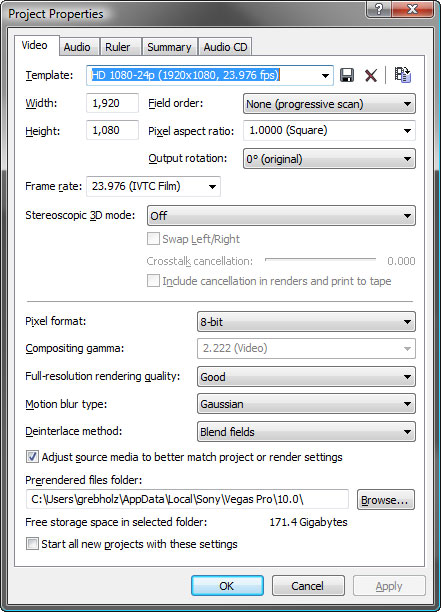
On the
Video tab of the Project Properties dialog box, set your project
properties to match your HDSLR footage.
If you know the exact properties of your footage, you can set those properties manually here or choose the appropriate template from the Template drop-down list. However, in order to be totally sure that your project properties match the properties of your footage, sample one of your files and let Vegas Pro software specify the proper settings for you. To do this, click the Match Media Settings button in the Project Properties window. This opens the Match Media Settings dialog box. In that box, navigate to the location into which you've stored your HDSLR files, select one of the files from that location, and click Open. Vegas Pro software adjusts the settings in the Project Properties Video tab so that they exactly match the file that you sampled. When you're done, click OK.
Now add your HDSLR footage to the timeline. Before you play your project, give some thought to your preview quality settings. If your HDSLR saves footage in certain AVC formats like AVCHD, AVC+AAC in MP4, and AVC+PCM in QuickTime, then you will see improved playback performance when you preview in any of the Draft and Preview quality settings (Auto, Quarter, Half, and Full). For example, the new Sony Alpha NEX-5 shown in Figure 2 records to one of those formats and thus you'll see improved playback with footage from that camera. You’ll also notice improvement in this area with the files from several of the Canon HDSLR cameras.
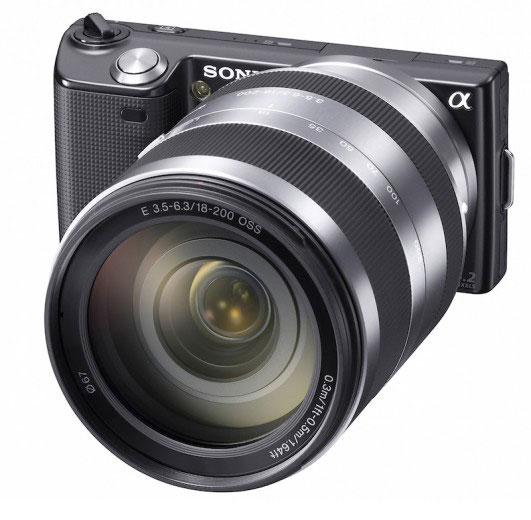
Files
from the Sony Alpha NEX-5 work more efficiently in Vegas Pro 10.
Another change we've made addresses playback of footage from your Canon HDSLR specifically. Our engineers have worked a little magic to develop a much more efficient method of decoding these files than was used in previous versions of Vegas Pro software. I won't pretend to understand the details of that new method, but the details don't matter anyway. All that matters is that the results are nothing short of spectacular. In Vegas Pro 10 you'll experience close to full-framerate playback on most modern computers at all Preview and Draft settings. Now you can really dig in and do some serious editing with the footage from these cameras!
One more point I'd like to make before I end this article. One of the major gripes about using HDSLR cameras for shooting video involves the limited support these cameras generally have for recording the audio portion of your video. These cameras generally were just not designed to provide high-quality audio recording.
Many shooters are addressing this problem with some sort of external audio recording device. These devices, like the Sony PCM-M10 Handheld Flash Recorders shown in Figure 3, are compact and affordably priced, yet make high-quality audio recordings that give you vastly superior results over the audio that your HDSLR records. The PCM-M10 for instance can record 24-bit audio at 96 kilohertz which is higher than CD-quality audio.
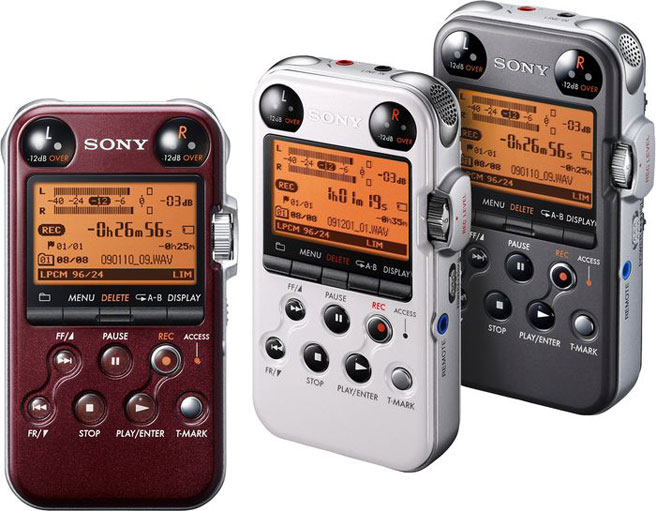
The
Sony PCM-M10 Handheld Flash Recorder with Built-in microphones and
speakers.
If you use one of these units to record the audio for your video, make sure to also record the audio on the camera even though you intend to use the higher-quality recording from your external recording device for the final edit. You'll need the camera's audio for use in syncing the audio from your external audio recorder to your video later.
Let's say you've shot your footage (along with the audio) with your HDSLR camera and recorded higher-quality audio with your Sony PCM-M10 or some other external audio recording device. You've brought both the footage from the camera (along with its corresponding audio) and the high-quality audio from your external recording onto your timeline. You need to ensure that the external audio synchronizes perfectly with the video. Here's where the camera's lower-quality audio saves the day. You can easily synchronize the good audio with the camera audio to ensure that the final audio is in sync with the video.
To do this manually, study the audio waveform for either the camera audio or the external high-quality audio and find a distinctive pattern in the waveform. You might look for things like door slams, a laugh, a hand clap, and so on. Just something that causes a distinctive and easily noticeable pattern in the waveform. When you find one, place your cursor at that location. Now, find the same pattern in the other audio event and line it up with the cursor. You may need to zoom into your project in order to get it just right. Once you get close visually, play your project and listen. Let your ears tell you whether or not you need to make any adjustments to the alignment of the clips.
While this method works perfectly well, it can be time consuming if you have many separate video clips to align with external audio. If that's the case, you can really benefit from a product called PluralEyes from Singular Software. PluralEyes works as a scripting extension to Vegas Pro software and automates the process of syncing clips together. Once you've installed PluralEyes, it's very easy to use.
First, add your video and external audio clips to the timeline. PluralEyes works completely automatically, so you don't even need to be very organized about how you put the media on the timeline. Just add your video clips and then add the external audio clips to a new track. For example, you can see in Figure 4 that my external audio events don't match their corresponding video events. They don't line up with each other and they're not even the same length. This is a very common situation since you'll first start one device (say your external audio recorder) and then the other so they won't have exactly matching start and stop times. The PluralEyes extension to Vegas Pro software will sort all of that out for you.

Add
your video and its corresponding audio to your timeline and then the
audio from your external recording device.
Since, as I mentioned, PluralEyes works on the robust Vegas Pro scripting architecture, it shows up as an extension under the Vegas Pro Tools menu. To run it and synchronize your clips, choose Tools | Extensions | Plural Eyes in Vegas Pro software. In the PluralEyes dialog box, click the Sync button. PluralEyes analyzes your project and aligns your external audio files with the proper video files from your camera. Even if it takes a little while for this analysis because you have a large number of clips in your timeline, it won't take nearly as long as it'll take you to do it manually. This is a huge time saver. You can see the results of my sync operation in Figure 5.
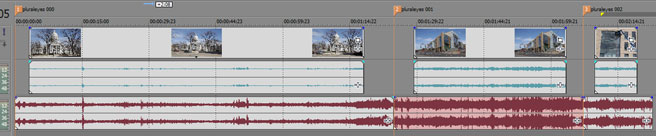
PluralEyes
has synchronized my external audio events with the video and I'm ready
to edit.
Now that your good audio is synced with the video, you're ready to edit. You can mute or delete the camera audio since you no longer need it. You might want to group the external audio events with their corresponding video events so that when you move one, the other comes with it and they remain in synchronization.
And finally, once you've edited your project, you can render it to any of the formats that Vegas Pro supports and deliver the final file to your client.
As you can see, the basic workflow for editing your HDSLR footage is really no different than that of a project that uses other types of footage. But hopefully this article has given you some tips on how to edit this type of footage most efficiently so that you can get your work done more effectively. HDSLR cameras are somewhat unexpectedly an exciting revolution in the video editing world and now Vegas Pro 10 puts you right at the forefront of working with footage from these cameras.
If you want more training on Vegas Pro 10 software and all of our other software titles, visit us in the training zone at There you'll find training books and videos including our popular Seminar Series training DVD packages that teach you the ins and outs of all of the new features of Vegas Pro 10 and our other professional-level applications. You'll also find free webinar archives and many free tutorial videos that walk you step by step through various features.


Комментариев нет:
Отправить комментарий