sony vegas видеоуроки,Sony Vegas Уроки,Сони Вегас Уроки,сони вегас про,Sony Vegas Pro 8.0,@Стабилизация Видео,Sonyvegas,Альфа Канал,@Vegas Pro,SONY Vegas видео уроки Sony Vegas: 12/06/12

УРОКИ СОНИ ВЕГАС

1 урок интерфейс,новый проект; 2 урок захват видео; 3урок импорт файлов в проект; 4 урок обрезка видео; 5 урок размещение файлов проекта в окне монтажа; 6сони вегас навигация в окне монтажа; 7урок вставка новых файлов в середину фрагментов в окне монтажа; 8урок приёмы обрезк; 9урок ефекты перехода; 10 сони вегас урок создание заглавных титров; 11 сони вегас урок создание прокручивыемых титроф для завершение проекта; 12 сони вегас урок новые звуковые дорожки и их создание; 13 сони вегас урок управление громкостью; 14 сони вегас урок Микширование двух звуковых дорожек и их установки; 15 сони вегас урок завершение звукового монтажа и удаление исходных звуковых фрагментов; 16 урок применение видео ефектов; 17 урок ефекты звуковой дорожки;

Поиск по этому блогу

четверг, 6 декабря 2012 г.

уроки сони вегас про

1. Import your footage, any Hotcakes background movie. We selected the Champagne loop from Wedding Essentials Vol 1.
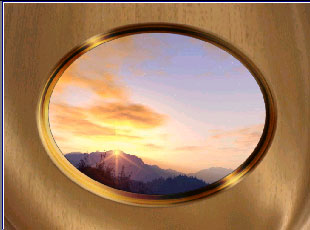
2. Import the OvalFrame.mov found in the QT PNG folder on Disc 2 of Wedding Essentials Vol 1.
3. Import the OvalMatte still image found on Wedding Essentials Vol 1 in the Stills and Mattes folder on Disc 2.
4. Right-click on OvalFrame.tga now in the Media Pool to bring up its Properties panel.
5. Set Pixel Aspect Ratio to 0.9091 (NTSC DV). Set Alpha Channel to Straight (unmatted).
5b. Repeat step 4-6 for OvalFrame.mov
6. Drag the OvalMatte.mov to  Track 1. Drag the OvalMatte still to Track 2. Drag the Champagne loop to Track 3, and AwesomeSunset to Track 4.
7. Make Track 3, the Champagne movie a compositing child track to the Ovalmatte track above.
NOTE: Copy all Digital Hotcakes animations from CD or DVD to your video hard drive before importing them.
8. Add a Video track FX to Track 2, the OvalMatte. Once you click on the icon shown to the right, you’ll be given a list of FX. Choose Sony Mask Generator from list and click on ADD then OK.
9. The following FX properties will come up. Select Alpha as Type.
10. Change the Composite Mode on Track 2, OvalMatte, to Multiply.
 You should see the following composition in your project preview window.

Here’s how to use Vegas Video to create a picture in picture effect.

Here’s how to use Vegas Video  to create a picture in picture effect.
1. Import your footage, and any Hotcakes background movie. We selected the PinkSatin loop from Wedding Essentials Vol 1.
2. Put your footage on Track 1 and PinkSatin on Track2
NOTE: Copy all Digital Hotcakes animations from CD or DVD to your video hard drive before importing them.
3. Click on the Track Motion icon for Track 1. Drag the handles inward to make the clip smaller. You can also reposition the clip by moving the box.
4. You can stop here to get this simple picture in picture, or continue for a snazzier effect.
5. Click on the Video Track FX icon to bring up video FX. Select Cookie Cutter. Click on ADD then OK.
6. Click on the Video Track FX icon to bring up Video FX. Select Cookie Cutter. Click on ADD then OK. Then the following properties panel will appear.
7. We chose the oval shape, feathered the edge and sized it down some to get the following results.
уроки редактирования, медиа реклама, моушн графика, видеомонтаж, 3D графика, спецэффекты,пост обработка, постпродакшн, инфографика, обучение, видеоуроки, videoedittng, tutorial, video, graphics, CG, nix, studio, edition, game, video, clip, movie,сайт, о компьютерных видеороликах, видеомонтаже, графике, мувмейкинге, клипмодинге, обучалки, статьи, видеоигры,готовые работы для новечков,альфа канал