In this fourth installment of our six-part series of tutorials on
Sony Vegas Pro 11, we're going to talk about the new Mixer layout. If
you're into audio mixing, you're going to find this really cool because
it's going to make your editing experience for audio more like using a
traditional hardware mixer. Let's check it out.
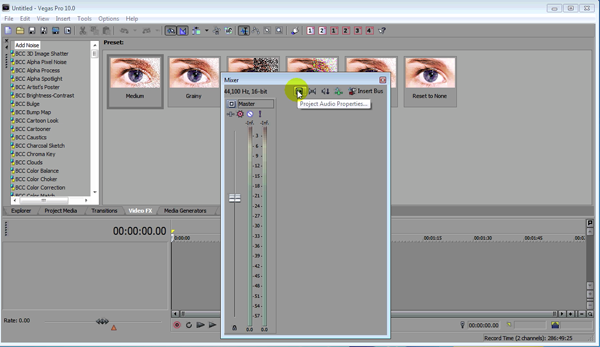
Figure 1. The audio Mixer in Sony Vegas Pro 10
Now, let's look at the somewhat comparable Master Bus in Sony Vegas Pro 11, our current version, and look at them side by side (Figure 2, below). What you see on the left-hand side of Figure 2 is the Mixer in Vegas 10; on the right-hand side here is the version in Vegas 11 that's called Master Bus. They look very similar, but there are a couple of differences worth pointing out.
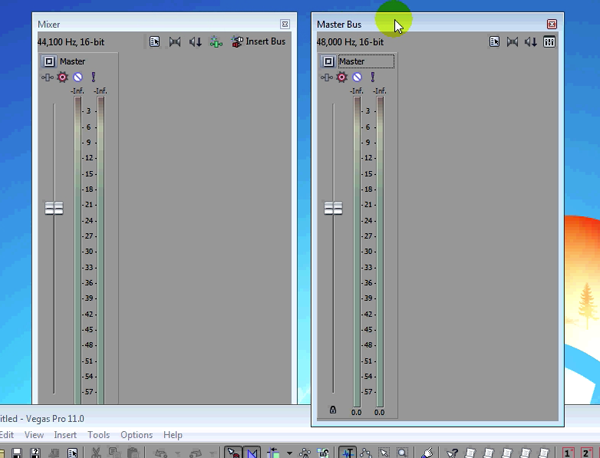
Figure 2. The old Mixer (left) and the new Master Bus (right side by side)
In Vegas 10 (left), you have the ability to insert a bus and to insert Assignable FX in this two-track Mixer. Sony has actually removed that from the Master Bus in Vegas 11. If you want that type of control, it's probably best to bring up the full Audio Mixer. We'll take a look at that here in just a moment. Other than that, there is no difference here between these two. You still have the ability to solo and mute your stereo channels here in Vegas 11's Master Bus (Figure 3, below).
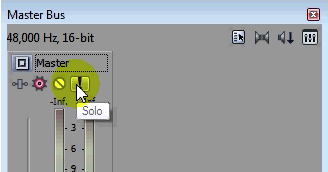
Figure 3. Soloing tracks in the Master Bus in Vegas Pro 11
One difference in the Vegas 11 version is that you can open your Mixing Console directly from the Master Bus (Figure 4, below). You couldn't do that before.

Figure 4. Opening the Mixing Console from the Master Bus in Vegas Pro 11
That kind of sums of the differences here between the two-track Mixers in Vegas 10 and Vegas 11. Let's have a look at the actual Mixing Console itself.
1
Get On the Bus
Let's take just a moment and look at the standard two-track Mixer in Sony Vegas Pro 10, the previous version of Vegas (Figure 1, below). You can see we have 44.1 kHz and 16-bit as default sampling rate and bit depth, respectively. We have a few options we can customize, such as Audio Properties, down-mix output, and the ability to insert a bus.
Figure 1. The audio Mixer in Sony Vegas Pro 10
Now, let's look at the somewhat comparable Master Bus in Sony Vegas Pro 11, our current version, and look at them side by side (Figure 2, below). What you see on the left-hand side of Figure 2 is the Mixer in Vegas 10; on the right-hand side here is the version in Vegas 11 that's called Master Bus. They look very similar, but there are a couple of differences worth pointing out.

Figure 2. The old Mixer (left) and the new Master Bus (right side by side)
In Vegas 10 (left), you have the ability to insert a bus and to insert Assignable FX in this two-track Mixer. Sony has actually removed that from the Master Bus in Vegas 11. If you want that type of control, it's probably best to bring up the full Audio Mixer. We'll take a look at that here in just a moment. Other than that, there is no difference here between these two. You still have the ability to solo and mute your stereo channels here in Vegas 11's Master Bus (Figure 3, below).

Figure 3. Soloing tracks in the Master Bus in Vegas Pro 11
One difference in the Vegas 11 version is that you can open your Mixing Console directly from the Master Bus (Figure 4, below). You couldn't do that before.

Figure 4. Opening the Mixing Console from the Master Bus in Vegas Pro 11
That kind of sums of the differences here between the two-track Mixers in Vegas 10 and Vegas 11. Let's have a look at the actual Mixing Console itself.
1
1
Using the Mixing Console
Notice that in Vegas 10, the previous version, that you could bring up the Mixer window or the Mixing Console window (Figure 5, below). That's a little bit confusing.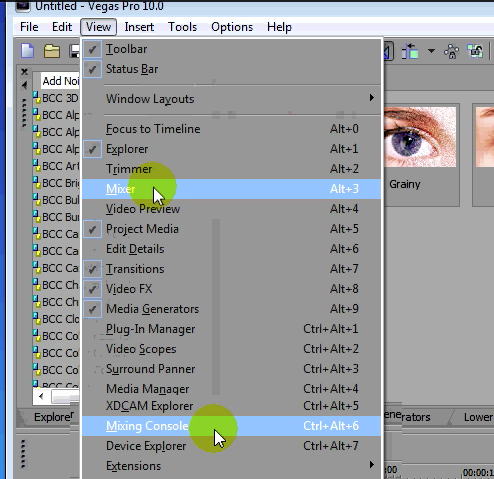
Figure 5. Opening the Mixer window (or the Mixing Console window) in Vegas Pro 10 from the same View menu (note: composite image)
In Vegas 11, again, these features are much better differentiated in their naming: Master Bus and Mixing Console (Figure 6, below). And remember that if you're looking at the Master Bus you can open the Mixing Console right from the Bus.
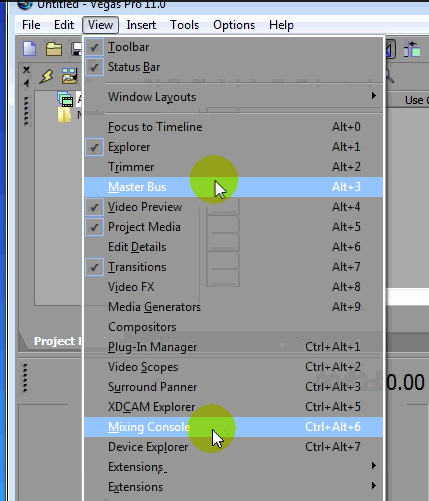
Figure 6. Opening the Mixer window (or the Mixing Console window) in Vegas Pro 11 from the same View menu (note: composite image)
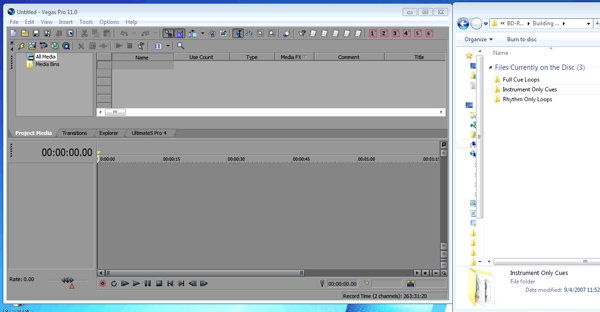
Figure 7 (below) shows a bit of a different preview of a Vegas project. This is Vegas 11. There's no video preview. We have just our workspace here. On the right side in Figure 7 we have a disc in the DVD drive from VASST called TrakPak 5: Modern Incidentals—Modern Scoring cues and Background Images.
1
Building a Soundscape
We're going to set up a little soundscape here for our major motion picture. Just to give you an idea of how it is to work with audio in Vegas, these files that we're working with here are actually royalty-free loops and little instrumental pads and patches and things that you can use in your productions. You can get these from a variety of sources. We're using some from VASST for this demonstration.Let's start with a rhythm loop. In Figure 8 (below) I'm grabbing a loop and setting it up in an audio track in the Vegas timeline.
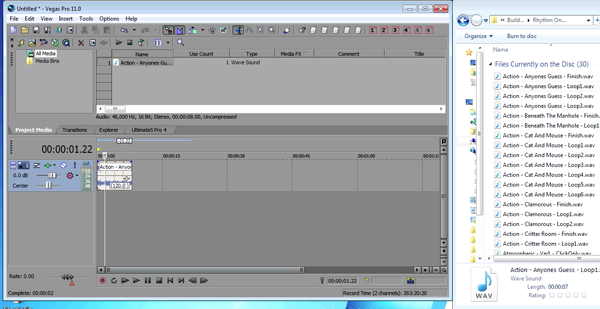
Figure 8. Adding some loops
It's easy to loop this audio clip. First, you make a copy of it by pressing Control, then clicking and dragging it across the timeline. And since it's designed as a loop, then it should play seamlessly from one clip to the other.
Next I'll grab a couple of other pieces of media, like some instrumental cues, as shown in Figure 9 (below). I really have no idea how these sound, but the beauty thing about this is it doesn't really matter at this point. You can see how they'll fit together.

Figure 9. Adding more media to the timeline.
I've also added the Master Bus (Figure 10, below), which is how most people would view their timeline.
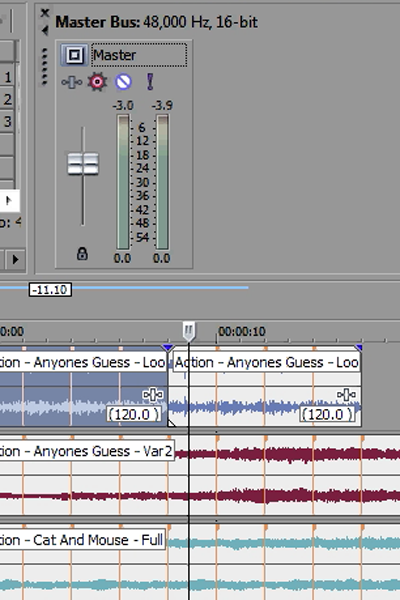
Figure 10. Using the Master Bus
What we have here is a track of rhythm instruments, and then two tracks of kind of instrumental music. This is the kind of standard master and Mixer view that we're used to seeing in Vegas when we're working on our video projects. But it's not the view that most audio engineers are used to looking at when they're dealing with multitrack mixers. So let's grab our Master Bus and click the open Mixing Console icon (Figure 11, below) and see what that looks like.
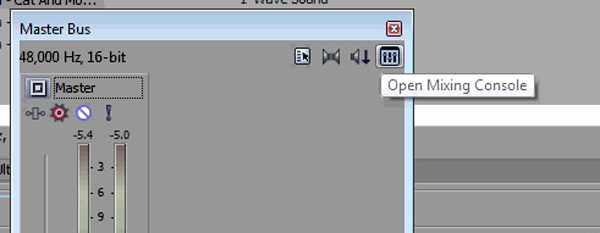
Figure 11. Opening the Mixing Console from the Master Bus
If we give our tracks names (Figure 12, below)...
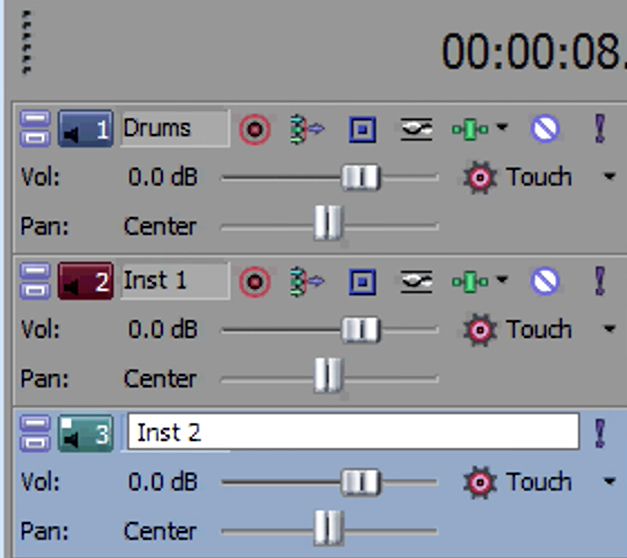
Figure 12. Naming the tracks
...we'll see the names that we've given them in the label on the bottom of each channel in the Mixing Console (Figure 13, below).
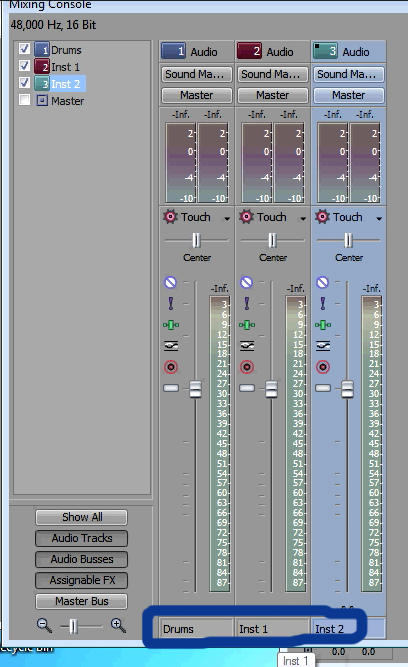
Figure 13. Named tracks at the bottom of the Mixing Console
Exploring the Mixing Console
Let's take just a moment and poke around the Mixing Console (Figure 14, below) for a little bit.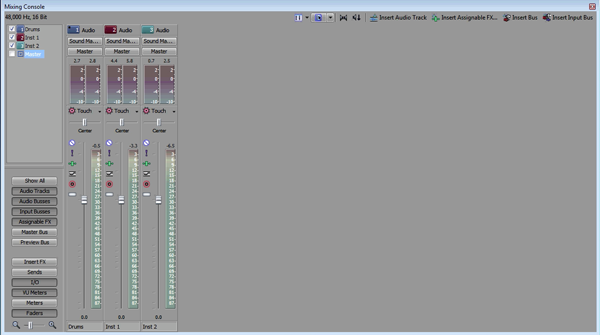
Figure 14. The Mixing Console
The Audio Properties (Figure 15, below) and layout are streamlined from previous versions.
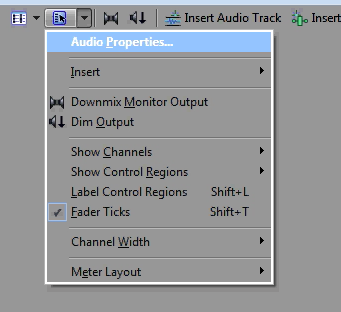
Figure 15. Audio Properties in the Mixing Console
All of our main controls are still across the top, as they have been in previous versions, in serving busses, Assignable FX, things like that.
You have a variety of ways that you can look at the levels of audio. You've got our old friend, the Master Bus, which you can bring right up (Figure 16, below).
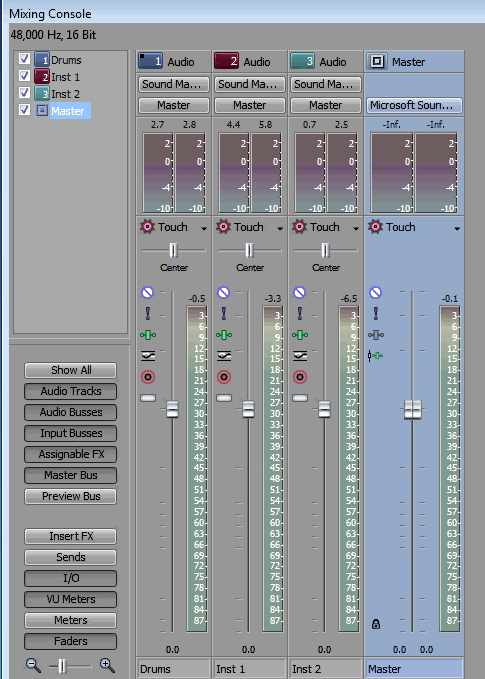
Figure 16. The Master Bus in the Mixing Console
You've also got VU meters. If you're used to working in any other digital audio workstation, you likely have a favorite way of viewing your workspace. And Vegas gives you all the flexibility to look at these levels any way you choose. Remember, Vegas started life as an audio workstation and it still has the best audio capabilities of any NLE on the market.
Play with the levels and experiment. Figure 17 (below) shows what's called "making everything louder than everything else." You'll notice that we're peaking in Figure 17. We're going above zero, which is always bad in digital audio. You never want to go above zero.
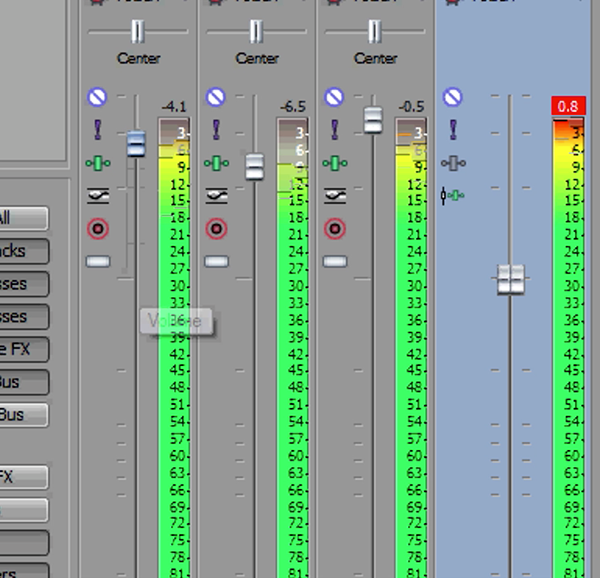
Figure 17. Louder!
So to keep that from happening, I'm going to add a mastering plug-in called MasterFX (Figure 18, below). There are a number of controls you can adjust in this plug-in, but I pretty much leave this the way it is. And you'll notice that no matter how we have these levels set, which are just entirely too high, it won't go above zero. And remember that if you double-click on a control in Vegas, it takes it back to its default setting, and the levels in the Mixing Console are no different.
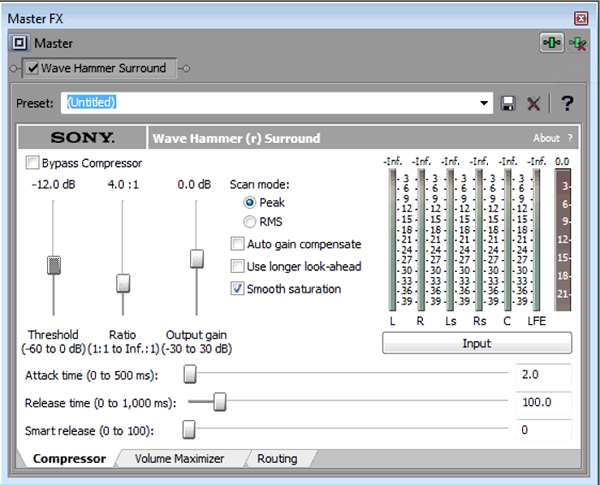
Figure 18. The MasterFX plug-in
So again, you've got individual channel levels, you've got VU meters, you've got your master output. You can insert your effects on the individual tracks right from this view.
So the next time you have an audio-only project or a project that uses many different audio tracks-typically it would be multiple tracks of music, a few tracks of dialogue, some sound effects, maybe even room tone-you might find that you'd benefit greatly from using the full on Mixing Console view in Vegas Pro. Check it out. I do think you'll like it. That's all for this tutorial. Thanks for reading, and we'll see you next time in Vegas.


Комментариев нет:
Отправить комментарий